מתחילים
הורד והתקן
הורד את התוכנה למחשב Windows או Mac והפעל אותה לאחר התקנתה.
הירשם
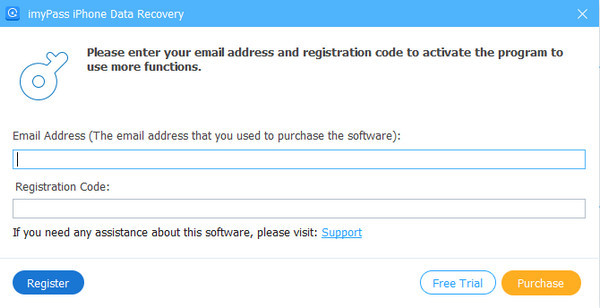
אם רכשת שחזור נתונים של iPhone, imyPass ישלח לך באימייל את קוד הרישום. עליך להזין את כתובת הדוא"ל ולהעתיק את הקוד לתיבה מסוימת בחלון ההרשמה. לאחר מכן, תוכל לרשום את התוכנה בהצלחה וליהנות מתכונותיה המלאות.
עדכון תוכנה
כדי לעדכן imyPass iPhone Data Recovery, אתה יכול ללכת לתפריט בחלק העליון של הממשק וללחוץ סמן עדכון..., אז הוא יזהה אם הגרסה הנוכחית היא העדכנית ביותר. אם לא, זה יאפשר לך לעדכן אותו. אתה יכול גם ללכת לאתר הרשמי של imyPass כדי להוריד את הגרסה החדשה ביותר.
תמיכת imyPass
imyPass מספקת לך תמיכה טכנית באמצעות מדריך עזרה מקוון. אתה יכול גם ליצור קשר עם צוות התמיכה שלנו דרך support@imypass.com.
שחזור ממכשירי iOS
שלב 1 חבר התקנים
לחץ פעמיים על התוכנית כדי להפעיל אותה ובחר שחזור ממכשיר iOS. חבר את מכשיר ה-iOS שלך למחשב באמצעות כבל USB או ברק.
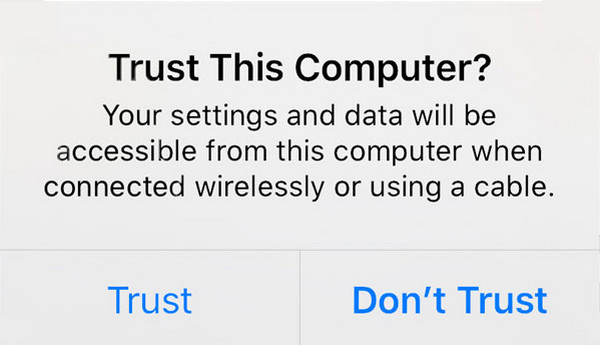
בטל את נעילת המכשיר שלך. זה ישאל אותך אם אתה יכול לסמוך על המחשב או לא. בֶּרֶז אמון. לאחר מכן לחץ הַבָּא במחשב שלך. אם המכשיר שלך הוא iPhone 4/3GS, iPad 1 או iPod Touch 4, יהיה עליך להוריד תוסף ולהיכנס למצב סריקה בעקבות השלבים בממשק.
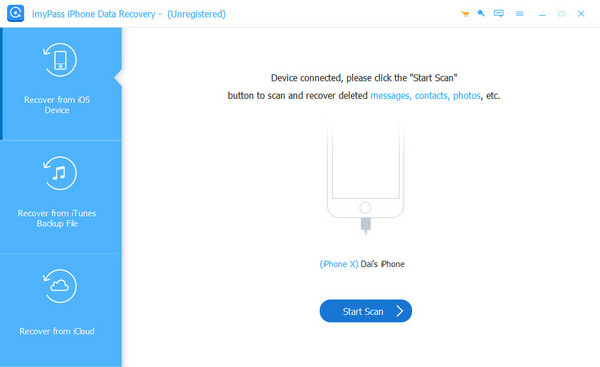
לאחר יצירת החיבור, לחץ על התחל סריקה לחצן, והוא יסרוק את כל הנתונים שלך באייפון שלך.
שלב 2 בחר נתונים
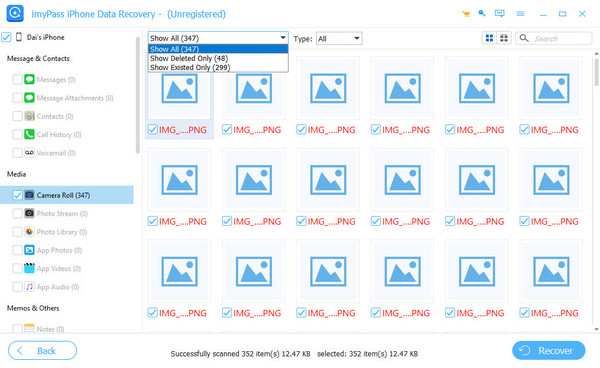
כפי שניתן לראות בתמונה הבאה, כל סוגי הנתונים יופיעו בסרגל השמאלי בין אם התוכנה מזהה או לא. הפרטים של הנתונים הסרוקים במכשיר שלך יוצגו באמצע ובימין.
בחלק העליון, אתה יכול לסנן את התוצאה על ידי מעבר בין הצג הכל ו הצג נמחק בלבד. אתה יכול גם להציג תצוגה מקדימה של נתונים אלה, כגון מידע ליצירת קשר, בסרגל הימני.
בחר את הנתונים שברצונך לשחזר על ידי סימון התיבה לפני כל פיסת נתונים.
שלב 3 שחזור נתונים
לאחר שתבחר את כל הנתונים שלך, לחץ על לְהַחלִים לחצן בפינה השמאלית למטה כדי להתחיל. אז זה יקפוץ חלון בתור התמונה הבאה. זה ישמור את נתוני היעד במחשב שלך. נְקִישָׁה לִפְתוֹחַ כדי להגדיר את נתיב השמירה עבור הנתונים שלך ולשמור אותם כגיבוי.
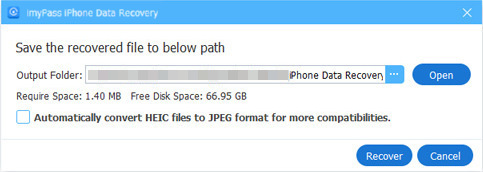
תוך כמה שניות זה יתבצע.
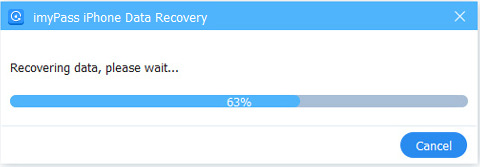
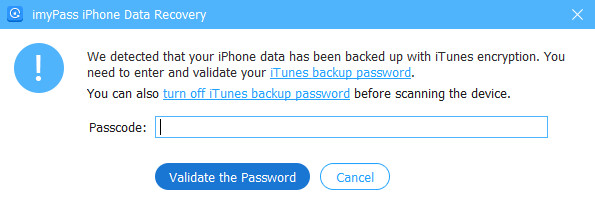
הערה: אם גיבית את נתוני האייפון שלך ל-iTunes בהצפנה, התוכנה תקפיץ לך חלון כדי להזין את סיסמת ה-iTunes. עליך להזין את הסיסמה כדי שהתוכנית תוכל להמשיך לסרוק את הנתונים שלך.
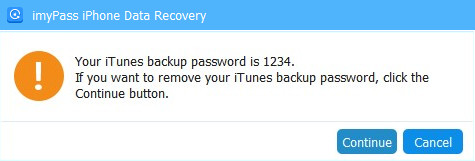
אם אין לך את סיסמת iTunes, תוכנה זו תגדיר עבורך סיסמה פשוטה.
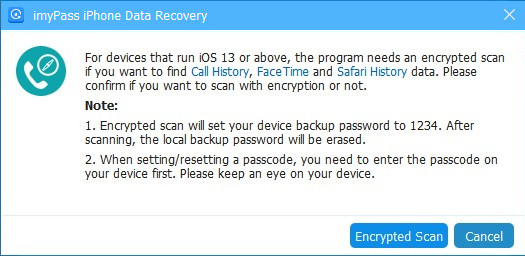
עבור משתמשי iOS 13 ומעלה, עליך לאשר אם ברצונך לסרוק נתוני היסטוריית שיחות, FaceTime ו-Safari עם הצפנה או לא. אם אתה רוצה, אנא לחץ סריקה מוצפנת. אם לא, לחץ לְבַטֵל, ולא תראה נתוני היסטוריית שיחות, FaceTime ו-Safari בתוצאות הסרוקות.
שחזור מגיבוי iTunes
אם אתה רוצה לשחזר את הגיבוי של iTunes, עליך להתקין את iTunes במחשב שלך.
שלב 1 הורד גיבוי של iTunes
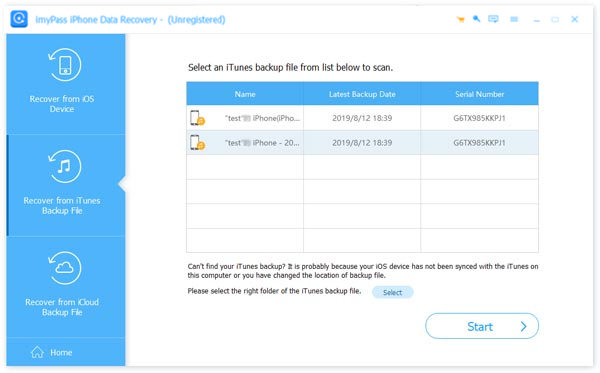
לחץ פעמיים כדי להפעיל תוכנית זו. במחשב שלך, בחר שחזור מקובץ הגיבוי של iTunes.
התוכנית תזהה אוטומטית את כל הגיבויים שעשיתם ב-iTunes. בחר גיבוי אחד שברצונך לשחזר בהתאם לתאריך הגיבוי (ודא שהגרסה העדכנית ביותר של iTunes מותקנת אצלך).
אם שינית פעם את תיקיית הגיבוי של iTunes המוגדרת כברירת מחדל, לחץ בחר כדי לבחור אותו באופן ידני.
לאחר שבחרת גיבוי, לחץ הַתחָלָה בפינה.
שלב 2 בחר את הנתונים
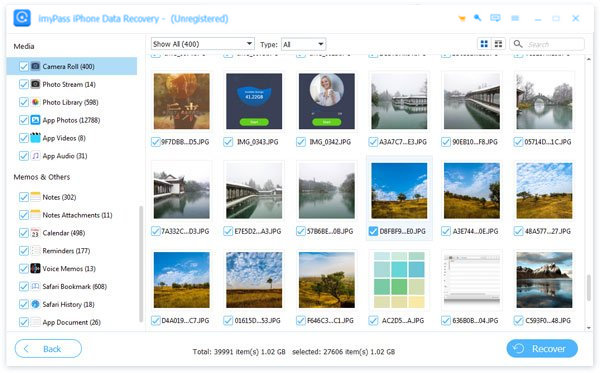
התוכנית תתחיל לסרוק את גיבוי ה-iTunes שלך במהירות ותראה לך את הנתונים בגיבוי זה. סנן את הנתונים על ידי סימון או ביטול הסימון של סוג הקובץ בסרגל השמאלי, בחירה הצג הכל, הצג נמחק בלבד, ובחירת סוג הקובץ בחלק העליון.
סמן את כל הנתונים שברצונך לשחזר. לאחר מכן לחץ על לְהַחלִים כפתור בפינה השמאלית למטה. עבור לשלב הבא.
שלב 3 שחזור נתונים
בחלון המוקפץ, לחץ לִפְתוֹחַ כדי להגדיר את תיקיית הפלט במחשב שלך. נְקִישָׁה לְהַחלִים.

הליך השחזור יתבצע תוך מספר שניות.

שחזר מגיבוי iCloud
לפני שתתאושש מגיבוי iCloud, ודא שיש לך גיבויים ב-iCloud שלך.
שלב 1 היכנס ל-iCloud
לחץ פעמיים כדי להפעיל תוכנית זו. חבר את מכשיר ה-iOS למחשב שלך והקש אמון בחלון המוקפץ של המכשיר שלך. במחשב שלך, בחר שחזור מ-iCloud.
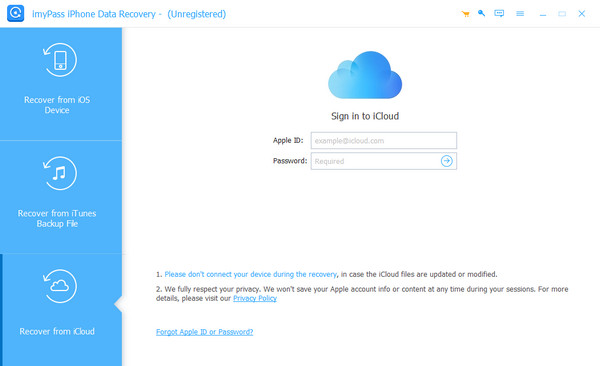
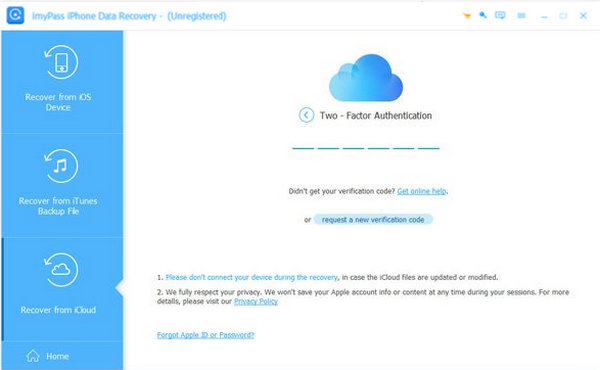
הערה: אם הפעלת אימות דו-שלבי, הזן את קוד האימות שקיבלת במכשיר שלך בתוכנה זו.
שלב 2 הורד גיבוי/בחר נתונים לסריקה
להלן שתי דרכים נפרדות לסריקת נתונים שנמחקו מ- iCloud.
הורד גיבוי לסריקה
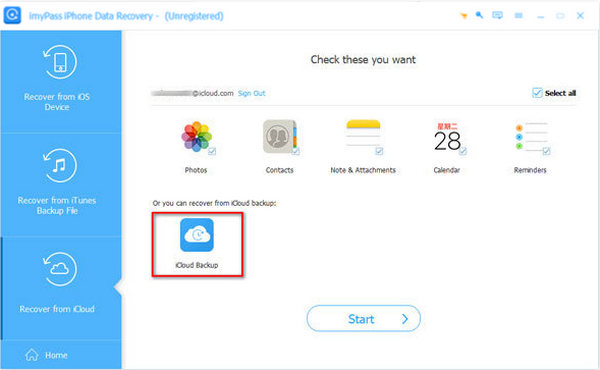
דרך אחת היא ללחוץ גיבוי iCloud לשחזור נתונים מגיבוי iCloud.
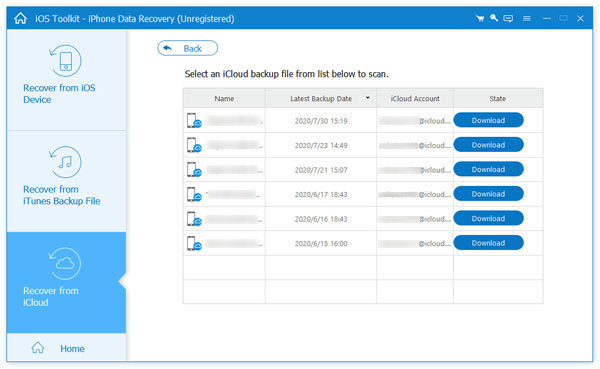
לאחר מכן, תוכל לראות את כל הגיבויים של iCloud שיצרת אי פעם. בחר אחד להורדה בהתאם לתאריך הגיבוי.
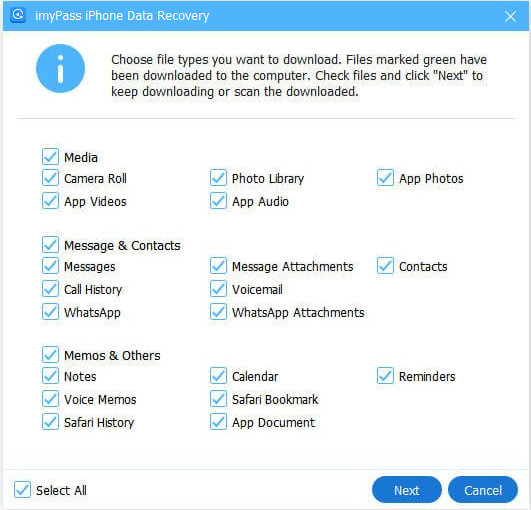
בחלון הבא, בדוק את סוג הנתונים שברצונך לסרוק. נְקִישָׁה הַבָּא ועבור לשלב 3.
בחר נתונים לסריקה
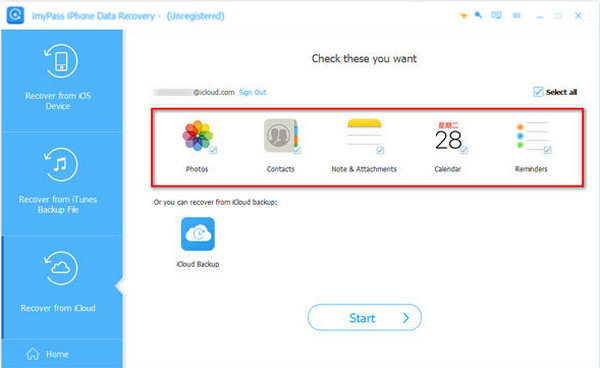
דרך נוספת היא לבחור את הנתונים המסונכרנים ב-iCloud שלך כדי לשחזר ישירות מתמונות, אנשי קשר, הערות וקבצים מצורפים, לוחות שנה ותזכורות.
לאחר בדיקת סוג הנתונים שברצונך לשחזר, לחץ הַתחָלָה ועבור לשלב 3.
שלב 3בחר ושחזר נתונים
כעת, אתה יכול לראות את כל נתוני iCloud שלך. סינון הוא על ידי סימון וביטול הסימון של סוגי הקבצים משמאל ובחירה מתוך הצג הכל ו הצג נמחק בלבד בחלק העליון.
לאחר שתבחר את כל הנתונים שברצונך לשחזר, לחץ על שחזור בפינה השמאלית התחתונה.
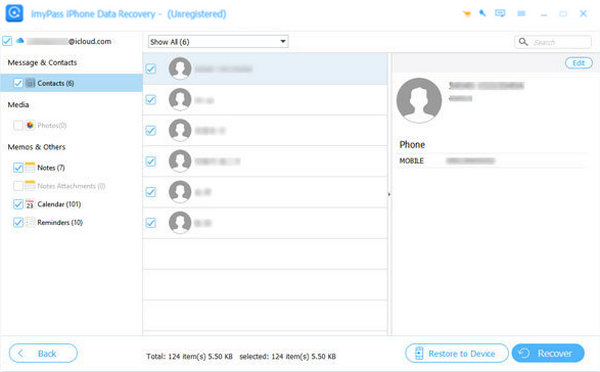
לחץ על פתח כדי להגדיר את תיקיית הפלט, ולחץ על שחזר כדי לשמור את הנתונים שלך במחשב.

הערה: כפי שמוצג בתמונת הנתונים של iCloud, יש כפתור בשם שחזר למכשיר. זה מוצג רק כאשר אתה בוחר את אנשי הקשר לשחזור. אתה יכול לשחזר ישירות את אנשי הקשר שלך ל- iDevice שלך על ידי לחיצה על כפתור זה.
 שחזור נתונים של אייפון


